Eulogy In Memoriam E.P.R.

Sharing my eulogy for my late father when we honored and celebrated his life during the memorial service. Today marks the first year of his passing. My heartfelt gratitude to everyone who supported and comforted me and our family.

Thank you everyone for being here.

With the indulgence of every father in this hall, let me start by saying that my dad is the best father, ever.

To those who may no longer recognize me or know me, my name is AK Refuerzo. Everyone calls me Andy now but before that, I go by Ryan. That’s the nickname my parents gave me.

I am the youngest of the two sons of EP Refuerzo and TA Refuerzo. To his officemates from DILG, I’m one of the two kids they bring to the office every now and then. Ako po yung mas bata at iyakin. Ako po yung mas gwapo at yung isa ay ang kuya ko. Biro lang yun kuya. Pero I’m sure matatawa din si Daddy sa joke na yun, magka mukha kami nyan e.

I am proud to call him my father for he was an awesome man.

He accomplished a lot and wore different hats throughout his life. To name a few things that I know of:

He was a sportsman achieving excellence in golf, championship trophies in tennis, gold medals in various international competition on marksmanship, playing basketball, karate and even running marathons in his younger years.

He was a salesman for Oracle Corporation handling government accounts and later on was able to establish his own successful IT company with him being the President and CEO. He was a consultant for the Department of Foreign Affairs and learned Japanese/Nihongo, an agent of the NBI and an honorary member of the Philippine Coast Guard. At one point in his life, he also held the position of President from our humble Home Owners Association to prestigious humanitarian organizations like the Rotary.

For 20 years, he was a public servant with the DILG achieving the position of Director and being conferred with the title of Career Executive Service Officer (CESO). In some of our private conversations, he would share that only the president can remove him from office – and as an impressionable young adolescent, I’d see him in the same light as with a super hero.

Being able to serve for a greater purpose is core to who he is. To him, it’s an ethical duty and moral obligation to be of service – to be part of the solution and not the problem.

For all the things that he is to other people, to me he is my father. My Daddy.

To our knowledge, dalawa lang talaga kaming magkapatid so wala sanang biglang bubukas na pinto at may sisigaw na “ako ang taga-pag mana!” Biro lang yun Mommy. Love you. At kung meron mang nagbabalak… Kapatid! Hashtag: real talk. Wala tayong pag uusapang mana.

Let me explain.

Mommy and Daddy always said, “wala kaming ibang ipapa-mana sa inyo kundi edukasyon.” They gave us the best education that they could afford; put a roof above our heads; clothes on our backs; shoes on our feet; and food on the table. And then some. And they did that not only to us – their sons – but also to countless people to give them – no, give us – a fighting chance in life. They’re not materialistic or boastful of the blessings they receive. They don’t hoard their fortunes and most of the time end up having just enough for themselves because they had to share their blessings to others. They sacrificed a lot, asked for so little but deserves so much more.

Out of all the things they provided for us, the best one is the positive environment to grow up in. He was my idol. It was through his actions and relationship with Mommy that we learned how to treat and be loyal to a woman and how to be a loving husband. It was through his hard work and sacrifices that we learned how to provide for our families. It was through him that we grew up from being playful kids to rebellious boys to men who conducts ourselves with self-respect, integrity and honor.

I am proud to call him my father for he was an awesome man.

Thank you Daddy for everything. I miss you so so much.

An Open Letter To My Twin Daughters

Dear Ada and Ava,

You are both the blessing that rocked me to my very core. The answer to our prayers and the miracle of our lives.

As I write this, the world is adapting to the new normal due to the global pandemic. Businesses have closed down, millions of people lost their jobs and the air is filled with uncertainty. It might seem like we are headed to a life of hardships and challenges but I need you both to be strong.

Be happy. Celebrate the successes of the other and become the support needed when one is feeling down from failure. Do not envy achievements and instead turn those into inspiration to do better. Draw strength from each other and lift each other up in times of need. Do the same to people around you, especially those whom you do not know but needs it the most.

Do good. The world is already unforgiving so be kind and be the reason for someone to restore their faith in humanity. Do not look unto your neighbor and compare what you have with what they have to gain a sense of achievement or fulfillment. If you must look unto your neighbor, it is with the intention to check if they have enough and if they need help. As you interact with different kinds of personalities, always remember that there is nothing wrong with being polite but being right does not excuse you from being rude.

Become your own person. Despite being twins, it is perfectly okay to be different from each other. Life is too short to be wasting time in trying to be someone you are not. Instead, allot time to fine tune your moral compass so that it always points to what is right despite pressure from others. Do what you feel is right and keep a clear conscience. Avoid the immoral, illegal, obscene, and offensive.

Explore the world with your big brown eyes wide-open filled with awe and wonder. Open your arms and be ready to accept what comes next knowing that you will overcome whatever challenges life throws at you. Go out onto the world and enjoy every moment. Find your passion, let your imagination fly, stick your head in the clouds but keep your feet firmly grounded.

I need you to do better and reach further than I ever did. But don’t count me out just yet, I’m not done chasing my goals and dreams. I still have the burning desire to raise the bar higher and carve my own path. I hope to be a good example to both of you and maybe someday you’ll think of me when the topic of the conversation among your peers turns to concepts such as integrity, loyalty, respect and excellence in the same manner that I think about your Lolo and Lola in the same light.

Dad

P.S. I love you both – in this life and the next.

Mechanical Keyboard Upgrade

A few years back, I bought a Das Keyboard 4C Ultimate TKL. It was my first mechanical keyboard and I absolutely loved it. It was an all-black keyboard made with an aluminum top plate and came with a ruler aptly called the FootBar which tilts the keyboard by 4degrees. It also came with an attached 6-foot USB cable.

One of the things I did after the novelty of blank key caps wore off was to replace some of the non-alphanumeric keys with green key caps with white lettering.

My Das Keyboard 4C Ultimate.

It was a joy to use especially during coding marathons. I like how clicky the keys were as my keyboard came with blue switches. Little did I know that they are not Cherry MX blue switches but rather Greetech blues.

Then one day, some of the switches are no longer working. No matter how much I press, it just wouldn’t register the key press. Some of the switches seemed to pick up the slack by registering the key press twice. I knew that part of the maintenance of mechanical keyboards was to clean up the switch contacts, lube the key stems and replace the springs as needed and that the time has come. Since it was already out of warranty when this happened, I thought maybe I can upgrade a few things here and there for this very durable and trusty keyboard.

It already feels like it was built like a tank since there was no flex on any part – thanks to the steel plate where the switches are mounted as compared to PCB-mounted alternatives. The things that I can do is to replace the other key caps, convert the 6-foot fixed USB cable to a detachable one, or replace the switches to Cherry MX blues. I decided to do all since I’m mostly at home.

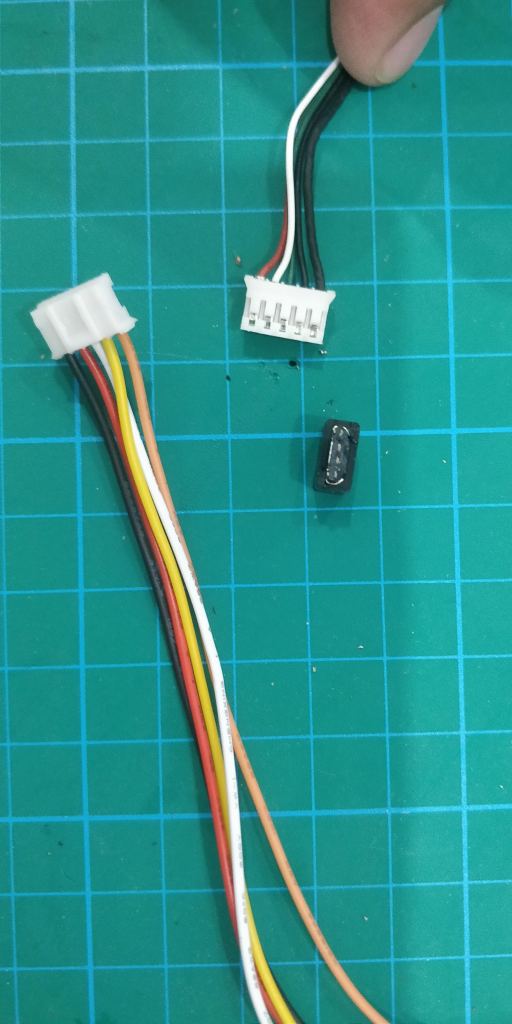
Good thing that the manufacturer of this keyboard went with a modular approach for the cable and used a 5-pin JST connector. I ordered a 2.0mm 5-pin JST pre-wired female connector and planned on splicing it with a USB Type-C OTG cable by trying to salvage the female end so that my keyboard can have a reversible USB Type-C receptacle. To my surprise, the wires on the Type-C standard are twice as many (to make it reversible, duh) but half as thin per wire than the normal. Maybe someday. Moving on the micro-USB seems like a better option since I still have good cables lying around for that.

2.0mm 5-pin JST connector detached from the PCB.
micro-USB female plug from an OTG cable.
De-solder and splice then shrink-wrap to make it nice.
Top view of my handiwork.
Another look at the micro-USB cable receptacle.

Next up is the move from Greetech switches to Cherry MX blues. I found a seller online but only had 50pcs on hand. I ordered and planned on making this work by replacing only the switches that are acting up and the alphanumeric ones. The switches that are perfectly working from the alphanumeric group will be moved to the modifier keys and/or vice-versa. While waiting for the shipment to arrive from overseas, I found a local online seller with 90pcs on hand that are of the RGB LED-compatible variant. Now, my keyboard does not have any LEDs but future-proofing isn’t that bad when it really comes in cheaper if you think about it. The real main difference is that one has a translucent housing that allows light from LEDs to pass through and light up the key caps. The switches can be … <insert BS here to convince self> … so I went ahead and ordered 90pcs (TKL or ten-key-less refers to the removal of the number pad commonly found on full-sized keyboards. This brings down the number of keys to 87/88).

De-soldered the most useless key as warm-up/practice.
Thanks to the temp-adjustable soldering iron, the PCB was not burned.
Took the opportunity to clean the front of the PCB. This is unreachable due to the metal plate and since this is a plate-mounted keyboard by design.
Started to solder the LED-compatible Cherry MX blues. Corners first so that the metal plate is firmly set in place.
Making my way to the center just cause I wanna.
With the aluminum top plate and all switches soldered in place. Just of posterity.
Key caps without the blank ones. Retro gray on the space bar and arrow keys.

All keys are like new and the USB 2.0 pass-through still works.

Between the Greetech blues and the Cherry MX blues, I find that the Cherry MX switches are less noisy/clicky compared to the Greetech. It is also a bit less firm but I don’t know how to describe it properly. Maybe this is what others are referring to as “mushy” feeling during key presses.

Anyway, the next step from here is to find some key caps. But in the mean time, the green and white will have to do.

VSCode Extensions for React

Recently I’ve been learning how to develop user interfaces using React on VSCode. And one of the things I liked about it are the available extensions that makes development easier. Now this list contains an extension that is specific to React but the others are mostly extensions that, in my opinion, enhances the overall experience while using VSCode.

So far, here’s the list of extensions that I found very useful:

ES7 React/Redux/GraphQL/React-Native snippets

As the (lengthy) name suggests, this is a collection of ES7-compliant code snippets for React, Redux, GraphQL and React Native. Yes, I just re-stated what the name said. It basically saves a whole bunch of keystrokes which is why this is helpful when developing React UIs.

Instead of typing out import React from 'react';, I would just need to type imr then hit tab.

Instead of typing out import PropTypes from 'prop-types';, I just type in impt then hit tab.

For importing other modules like custom ones or from third-parties, instead of typing out import customModuleName from 'customModule';, I just type imp then hit tab, type in whatever is the actual name of customModule is then hit tab again to type in the corresponding customModuleNamethen another tab which brings me to the end of the line for the ;

You call it lazy, I call it productive! Potayto, potahto.


ESLint

This extension integrates ECMAScript (ES) standards and code linting (Lint) into VSCode. It checks your code as you type it and generates suggestions if it finds some patterns of code that does not follow the (coding) standards set.

Without being technical about it and its origin, ECMAScript is a standard that is followed by scripting languages which includes JavaScript.

Code Linting on the other hand is a type of static code analysis that finds pieces of code that does not adhere to the standards and/or is problematic from the point of view of certain coding guidelines.

There’s a wide range of configurable settings that can be fine-tuned to fit your coding style or just follow the default. What I like about this is that it give suggestions on how to fix your code and is also non-obtrusive.

eslint-href


Prettier – Code Formatter

This extension re-writes your code based on a specific set of (configurable) rules which then forces a consistent coding style. This actually works hand-in-hand with ESLint – at least with how I configured my VSCode settings.

Are you using tabs or spaces? What tab size are you using for JS? How about your brackets, are they inline or next line? When will we start wrapping code when a one-liner is too long?

The code re-write can be triggered manually for the whole file or for a code selection via key bindings. It can also be triggered for the whole file before committing code in your repository using pre-commit hooks or automatically upon saving the changes you made in VSCode.


IntelliSense for CSS Class Names in HTML

When you have bootstrap, material design, font awesome, themes and other custom styles for your UI, CSS class names can sometimes be hard to remember. With the IntelliSense for CSS Class Names in HTML extension, you get an auto-suggested class name once you start typing on the class or className attribute. It also throws in auto-completion for added laziness productivity. It caches the CSS class definitions on your workspace and on files referenced through the link element in the html header.


Bracket Pair Colorizer

Have you ever wasted time looking for that missing closing bracket because of your elegantly copy-pasted written code? Fear no more as Bracket Pair Colorizer …erm… colorizes your bracket pairs!

Angle brackets/chevrons requires a bit of tinkering as well as custom character brackets but works well with square brackets and round brackets/parenthesis and curly brackets/braces/handlebars/mustache. Unless of course if you are color blind… wait, I think this can be configured for that too.


Honorable Mentions

JavaScript Console Utils

CTRL+SHIFT+L gives you console.log();

Select a variable then CTRL+SHIFT+L gives you console.log('variable_name: ', variable_name);

CTRL+SHIFT+D removes all console.log statements in the current document.

Code Spell Checker

Because who wants to read code AND comments with wrong spelling, right? Yeah right, comments on your code. Haha.


PlayStation On My Workstation (kinda)

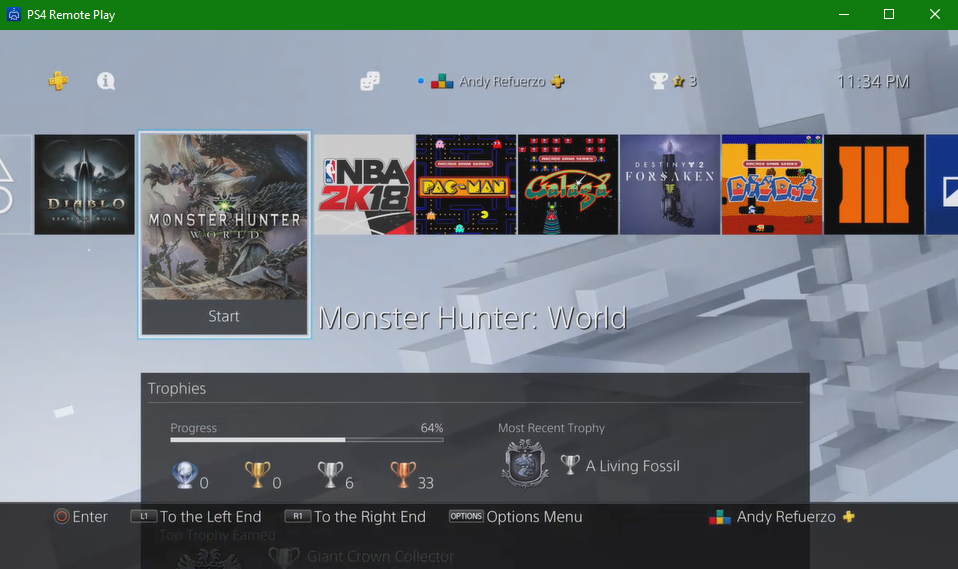
I was working on a project at home and got bored. I needed a break and thought to myself maybe I should spend a couple of hours with my PS4. I went to the living room and was surprised how high the temperature is outside. If only I can play with my PS4 where it is comfy… I didn’t want to re-setup the PS4 inside the bedroom just so I can play where the air conditioner is at. Then I remembered an article I came across where it discusses a feature such that the PS4 can be accessed remotely and the display will be shown in either a compatible Android device or a PC/Mac. Anyway, I got in front of my work area and Googled for it.

To get this going, here’s a list of things you need:

  • PS4
  • Windows PC
  • DualShock4 (DS4) wireless controller (yes, the one that you use on the PS4)
  • USB cable (Type A to Micro B – yes, the cable you use for charging the DS4)
  • PSN Account
  • Internetz
  • PlayStation Remote Play Desktop App (click Windows PC)

Here’s what you need to do on both PS4 and Windows PC.

On the PlayStation 4

Enable PlayStation Remote Play

  • Go to Settings > Remote Play Connection Settings

ps4-settings

  • Select Enable Remote Play

enable-remoteplay

Activate as Primary PS4

  • You also need to make sure that your PS4 is activated as your primary PS4. You can do this by going to Settings > Account Management > Activate as Your Primary PS4

active-primary-ps4

On the Windows PC

Install PlayStation Remote Play Desktop App

  • Once the download for the PlayStation Remote Play Desktop App completes, double-click on it (RemotePlayInstaller.exe) to launch the installer. Keep on clicking Next until the installer finishes. When it does, skip the next part below. Unless you encounter the following error.

Media Feature Pack Error

remoteplay-error

This error will prevent you from installing the desktop app and will open a browser to the media feature pack page when you click Ok. In the event that you encounter this error, which I did, here’s what you can do first to save time and effort.

  • Press Win+R and type in optionalfeatures
  • Ensure that Media Features and Windows Media Player are both checked and click Ok

wmp

At this point you can retry to install the PlayStation Remote Play app and it should finish without issues.

Connect the DualShock4 (DS4) Wireless Controller

Connect the DS4 to the Windows PC. Big end of the cable goes to the PC. Small end of the cable goes on the top portion of the controller. Windows should automatically install the drivers needed. Easy peasy.

Launch and Configure the PlayStation Remote Play Desktop App

  • Double-click on the PS4 Remote Play icon then click on the Settings button

ps4-remoteplay-settings

  • Sign In using your PSN Account
  • Select a Resolution (360p, 540p, 720p, 1080p)
  • Select a Framerate (Standard, High)
  • Click Ok then click on Start
  • The app would then start searching for a PS4 nearby.

ps4-nearby

  • Once it finds your PS4, it will show that it is connecting to it and will display the icon that it will show when the connection goes bad.

ps4-connecting

  • There is an on-screen menu from the bottom of the window that appears when the mouse enters the PS4 Remote Play screen. You can click on the full-screen button to go, er, fullscreen.

ps4-remoteplay

  • In case the DS4 controller does not work, unplug it for a bit then reconnect it again.

In my ahem limited time trying this feature out, I experienced that while playing Diablo 3, it stutters a bit especially when there are hordes of enemies on-screen. The audio is also affected which is why I’ll probably try to use the 720p or less (yuck) resolution to see if that helps. But if there are just a few creatures being rendered on-screen, the experience is actually pretty nice. Fluid motion and clear audio, no ghosting nor on-screen artifacts. The audio came through the audio port on the DS4. The PS4Pro was on wifi (5GHz band) and so was the Windows PC (which is actually a non-gaming laptop).

Anyway, I’m pretty happy with the Remote Play feature and so is the wife. So much so that she was egging me to find a comfy seat that’s good for working and also for gaming.

Her idea, not mine. >:)

Scam at the BGC Stopover Parking

Parking is expensive at Bonifacio Global City (BGC). The current rate for most of the parking facilities, BGC Stopover included, charges PhP50.00 for the first three hours then PhP50.00 for each succeeding hour or any part thereof. For a regular nine hour work-day, that amounts to a total of PhP350.00! As a way to reduce that cost, I usually move my car out before the first three hours is up – usually 5-10 minutes. Then go back in for a fresh three hours. I do this, together with other patrons, as many times as needed until I get to some parking facility that has a lower rate.

In the case of BGC Stopover, they are very strict at implementing the “any part thereof” that even if you exceed by just one minute, you pay PhP100.00 (50.00 for the first three hours + 50.00 for the excess one minute). To give the proper context, the payment counter for the parking is located at basement 1 of BGC Stopover. Once you step up to the counter, the cashier gets the RFID card and scans it to know the timestamp when you entered and compute for the number of hours/minutes you’ve parked. Once you pay, you get a ten minute grace period to get your car out of the parking facility before it charges you an additional hour.

As a law-abiding “BGCtizen”, one does not argue whether the policy is too strict or whether the rate is too high. They’ve set the rules and we follow it no matter how absurd the rates are. The system is stable such that it records the time of entry and computes for the minutes and you pay based on the agreed-upon rates. We, the patrons, act accordingly. Until the system destabilizes.

Beginnings of a Scam

This week, the RFID system is down. The payment counter at basement 1 is no longer manned. They placed someone at the entrance to record the plate number and time of entry on a piece of paper. They also placed someone at the exit ramp to get that piece of paper, computes for the number of minutes and asks for payment.

Today was supposed to be just like any normal day. I follow the law, abide by the agreed-upon contract of using the parking facility for my car and pay the corresponding amount. On my first three hours, I was lucky enough to get out without any issues and with just a short queue of cars. I paid PhP50.00. I overheard the guard on duty that the cashier is really slow and that she must be new.

Then after almost three hours, I, the law-abiding “BGCtizen” went to move my car before my second three hours was up. I headed to my car, started the engine and drove to the exit. And in good faith, respecting the agreed-upon contract, I had around 10 minutes left. When I reached the first turn, lo and behold, there was a line of cars. I waited and waited, moving inch by inch as the cars in front of me slowly progressed towards the exit. I should be out by 4:25PM and at this point, I knew I wouldn’t make it. I was inconvenienced and somebody isn’t holding up their end of the agreement. But I have had faith in the system. And when it was finally my turn, I was being asked to pay for PhP100.00. The cashier said that I was over 4 minutes.

I insisted that I was in line and was just waiting for my turn. I even have proof. She said I should have adjusted so that I can get out before my time was up.

And that’s when I, the law-abiding “BGCtizen” lost it.

Screenshot_20181107-193455.jpg

I tried to rationalize her statement. I wanted the system to be stable. In my head I was asking myself, how can I adjust? How will I know how slow she would be? Do I compute the rate of cars going out factoring in the cars that were merging from the other direction and the cars that are moving around to get to the basement 2? How do I compensate for the cascading delay of motion of each driver coming from a full stop?

What’s to stop her from deliberately slowing down so that everyone ponies up the extra PhP50.00? How many minutes should I adjust back? Do I go there 20 minutes earlier? 30 minutes? The agreed-upon contract was PhP50.00 for the first three hours then PhP50.00 for each succeeding hour or any part thereof. Not two and a half hours!!! Nowhere in the agreement was a clause that says I am still responsible for the excess minutes even if the cause of delay was the system. Did I acted in bad faith? Did I try to game the system by four minutes? What happened to the ten minute grace period?

The location where the cashier is currently at also blocks those who are moving around the ramp to get into basement 2. This does not make sense and is either not well-thought of or a deliberate way to congest and delay cars from moving around.

When I exceed by even one minute, I, the law-abiding “BGCtizen” pay up. But when they are at fault, they still have the audacity to be strict and not even stop and think for a bit that they were the ones causing the bottleneck. They were the ones delaying everybody to their advantage. They were the ones scamming everyone.

Simplest Solution Makes the Most Sense

Bring back the old system of paying first before getting into the cars. Even if this is done manually, it will still be more efficient than the current one. No arbitrary adjustments required. Have someone posted by the exit just to check if the time-out is within the ten minute grace period.

You’re welcome.

Gallery

Asus RT-AC86U Unboxing Photos

Back in 2016, I got myself an Asus RT-AC88U router. Fast forward to 2018 and I got a new router in the form of Asus RT-AC86U. At this point, you might have two questions in your mind: (1) What’s the difference between the two? and (2) Why switch from RT-AC88U to RT-AC86U? Let me answer the first question by giving this link straight from Asus that compares both routers. But in a nutshell the differences are as follows:

Asus RT-AC88U

  • Link Aggregation (802.3ad) on Port 1 & 2 (not available on the RT-AC86U)
  • 8 Gigabit Ports (vs. 4 on the RT-AC86U)
  • MIMO 2.4GHz 4×4 (vs. 3×3 on the RT-AC86U)
  • 4 External Antenna (vs. 3 on the RT-AC86U)

Asus RT-AC86U

  • 256MB Flash (vs. 128MB on the RT-AC88U)
  • 1.8GHz dual-core processor (vs. 1.4GHz on the RT-AC88U)
  • 3 External and 1 Internal 3dBi  Antennas (vs. 4 External on the RT-AC88U)

I’ll try to answer why I switched after the unboxing photos.

The box of the RT-AC86U router is big but not as big as the RT-AC88U’s. You can also see some of the features and marketing material in front of the box.IMG_20180930_101054

Looking at the packaging closer, you’ll see that the logo for AiMesh and RangeBoost are just stickers which were added after the box was produced. This is due to AiMesh being made available to select router models via firmware update. In other words, AiMesh came out after the RT-AC86U was released in the market.IMG_20180930_101640

The actual box that holds all the hardware is just a white box. A big difference from the box of the RT-AC88U.IMG_20180930_101850

Upon opening the box, you’ll be greeted with the router itself and the WTFast flyer. Holding the router and other hardware components is a recycled carton similar to what Starbucks is using as take-out trays.IMG_20180930_101908

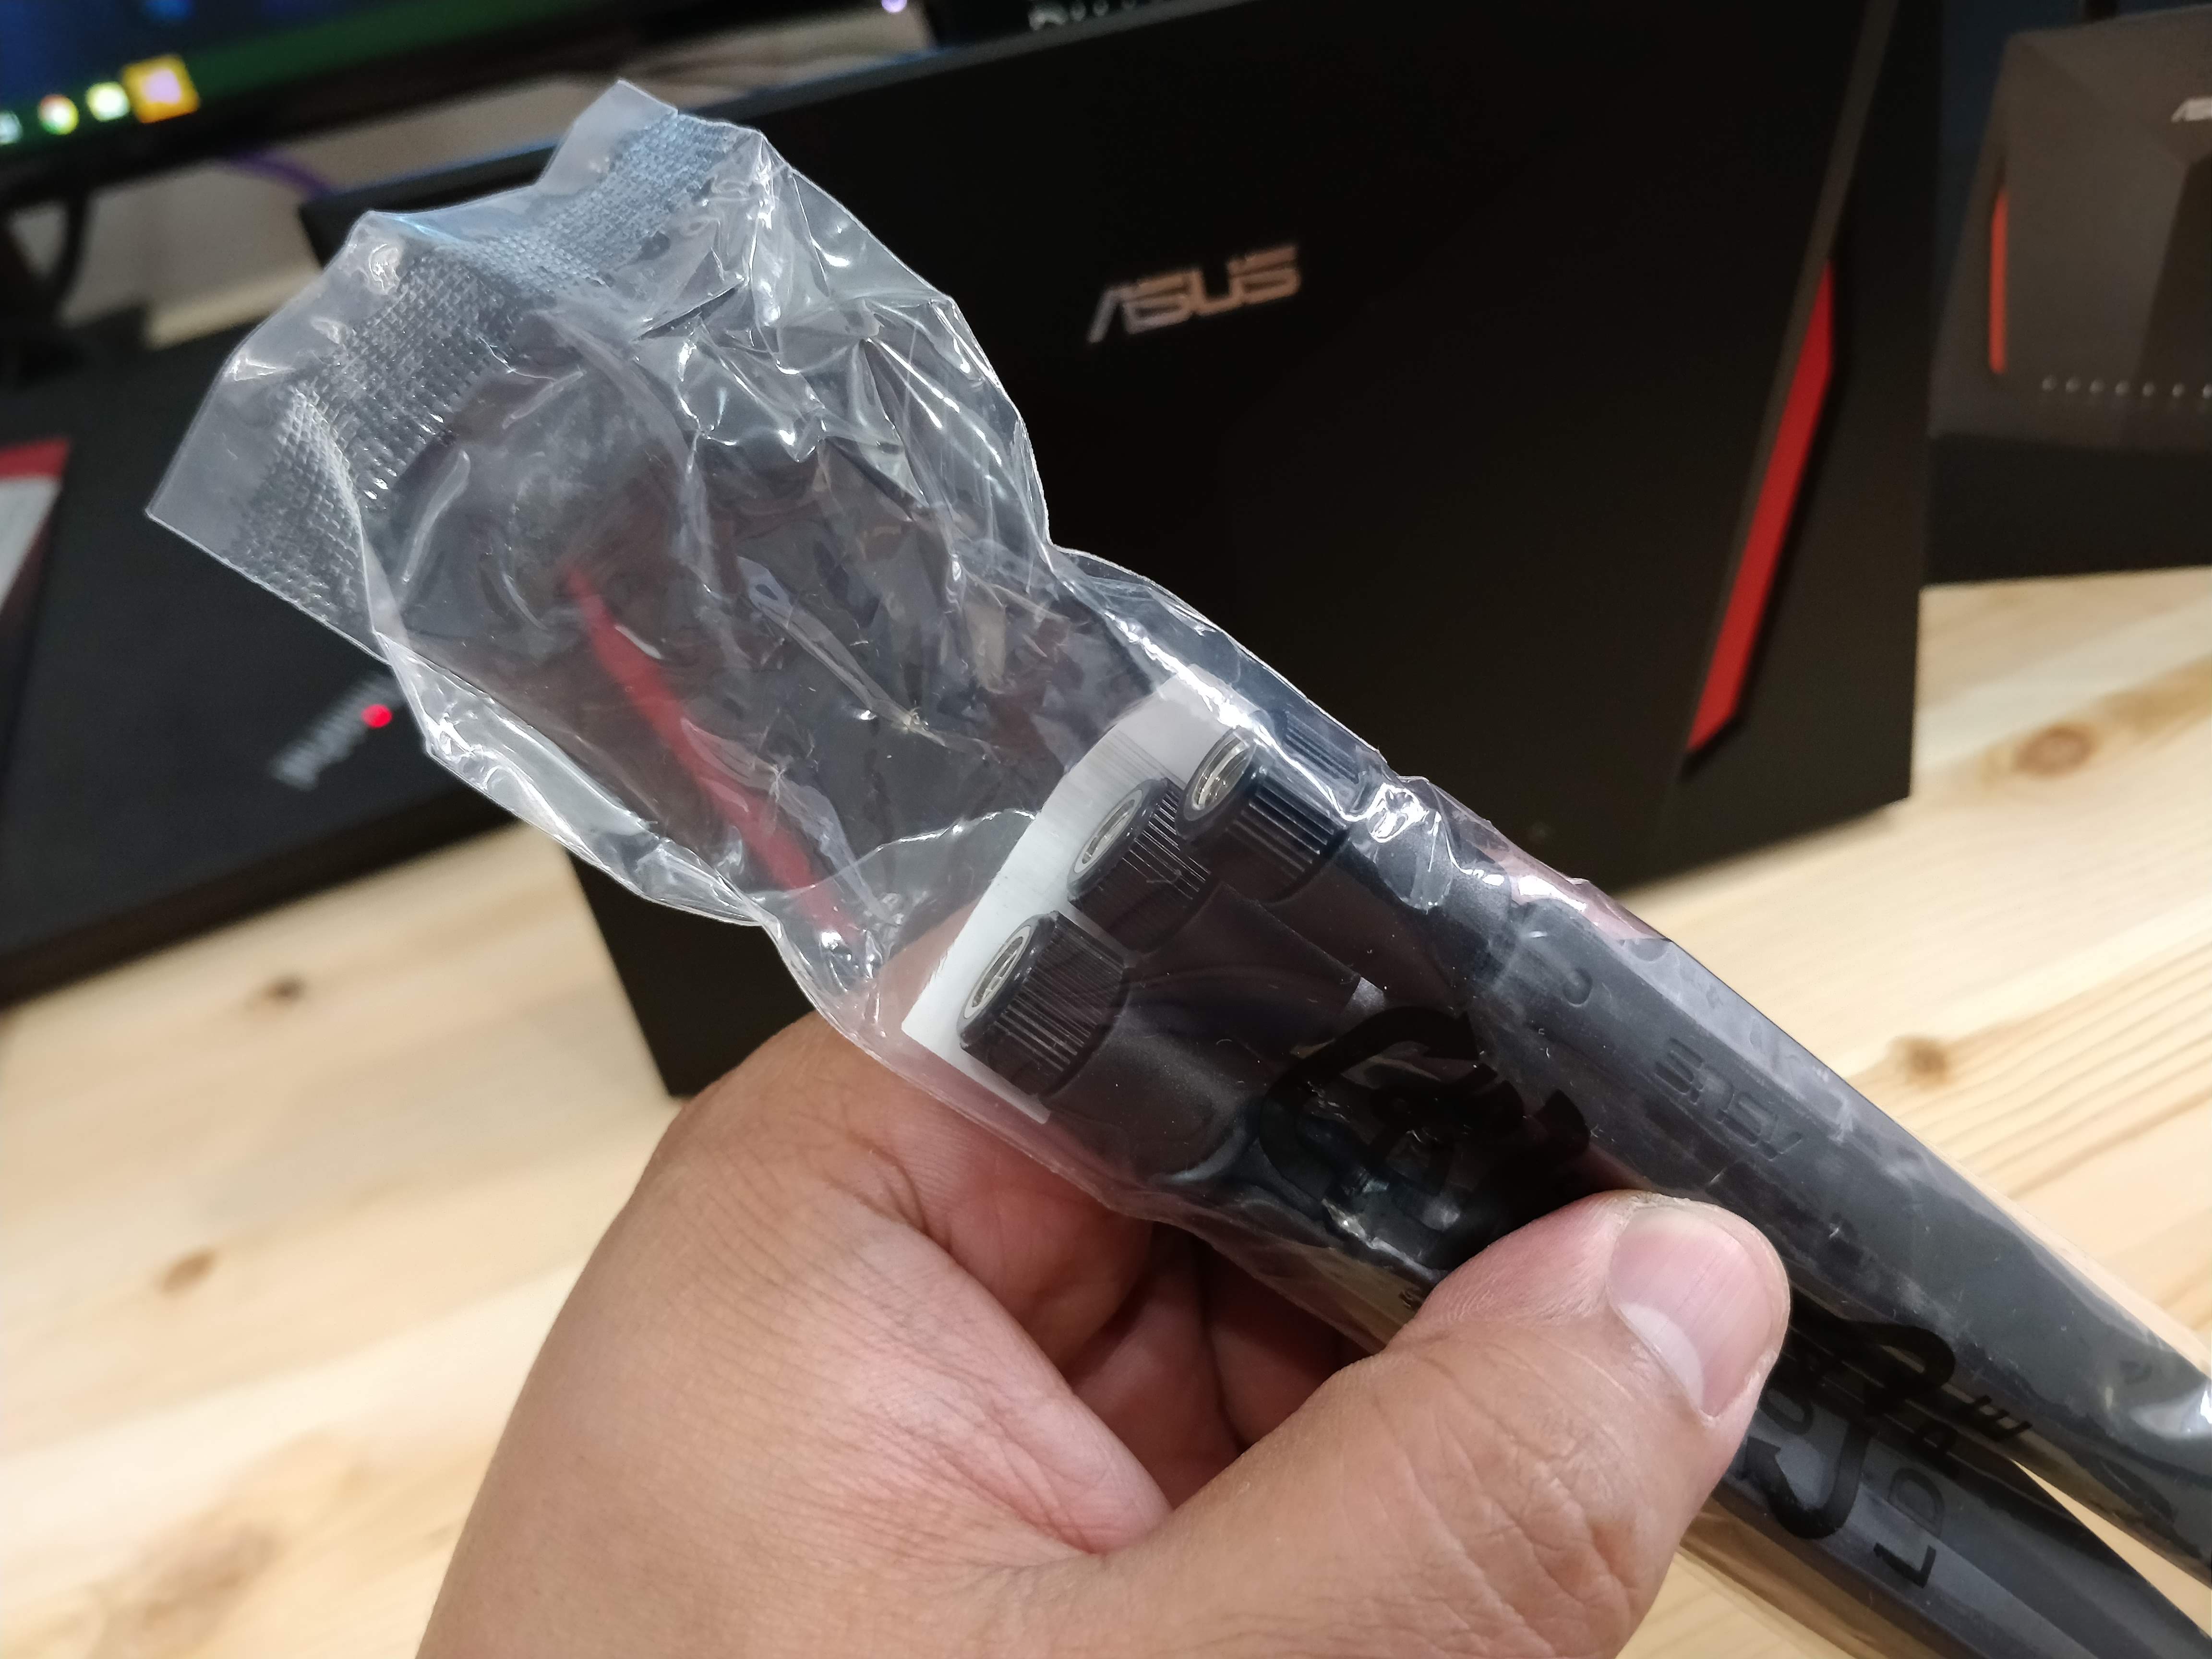
Here’s a closer look of the other hardware components that comes with the unit. The 3 antenna on top, 1 RJ45 LAN cable, the power brick and 3 outlet plug options.IMG_20180930_102125

Here are the box contents for posterity.IMG_20180930_102307

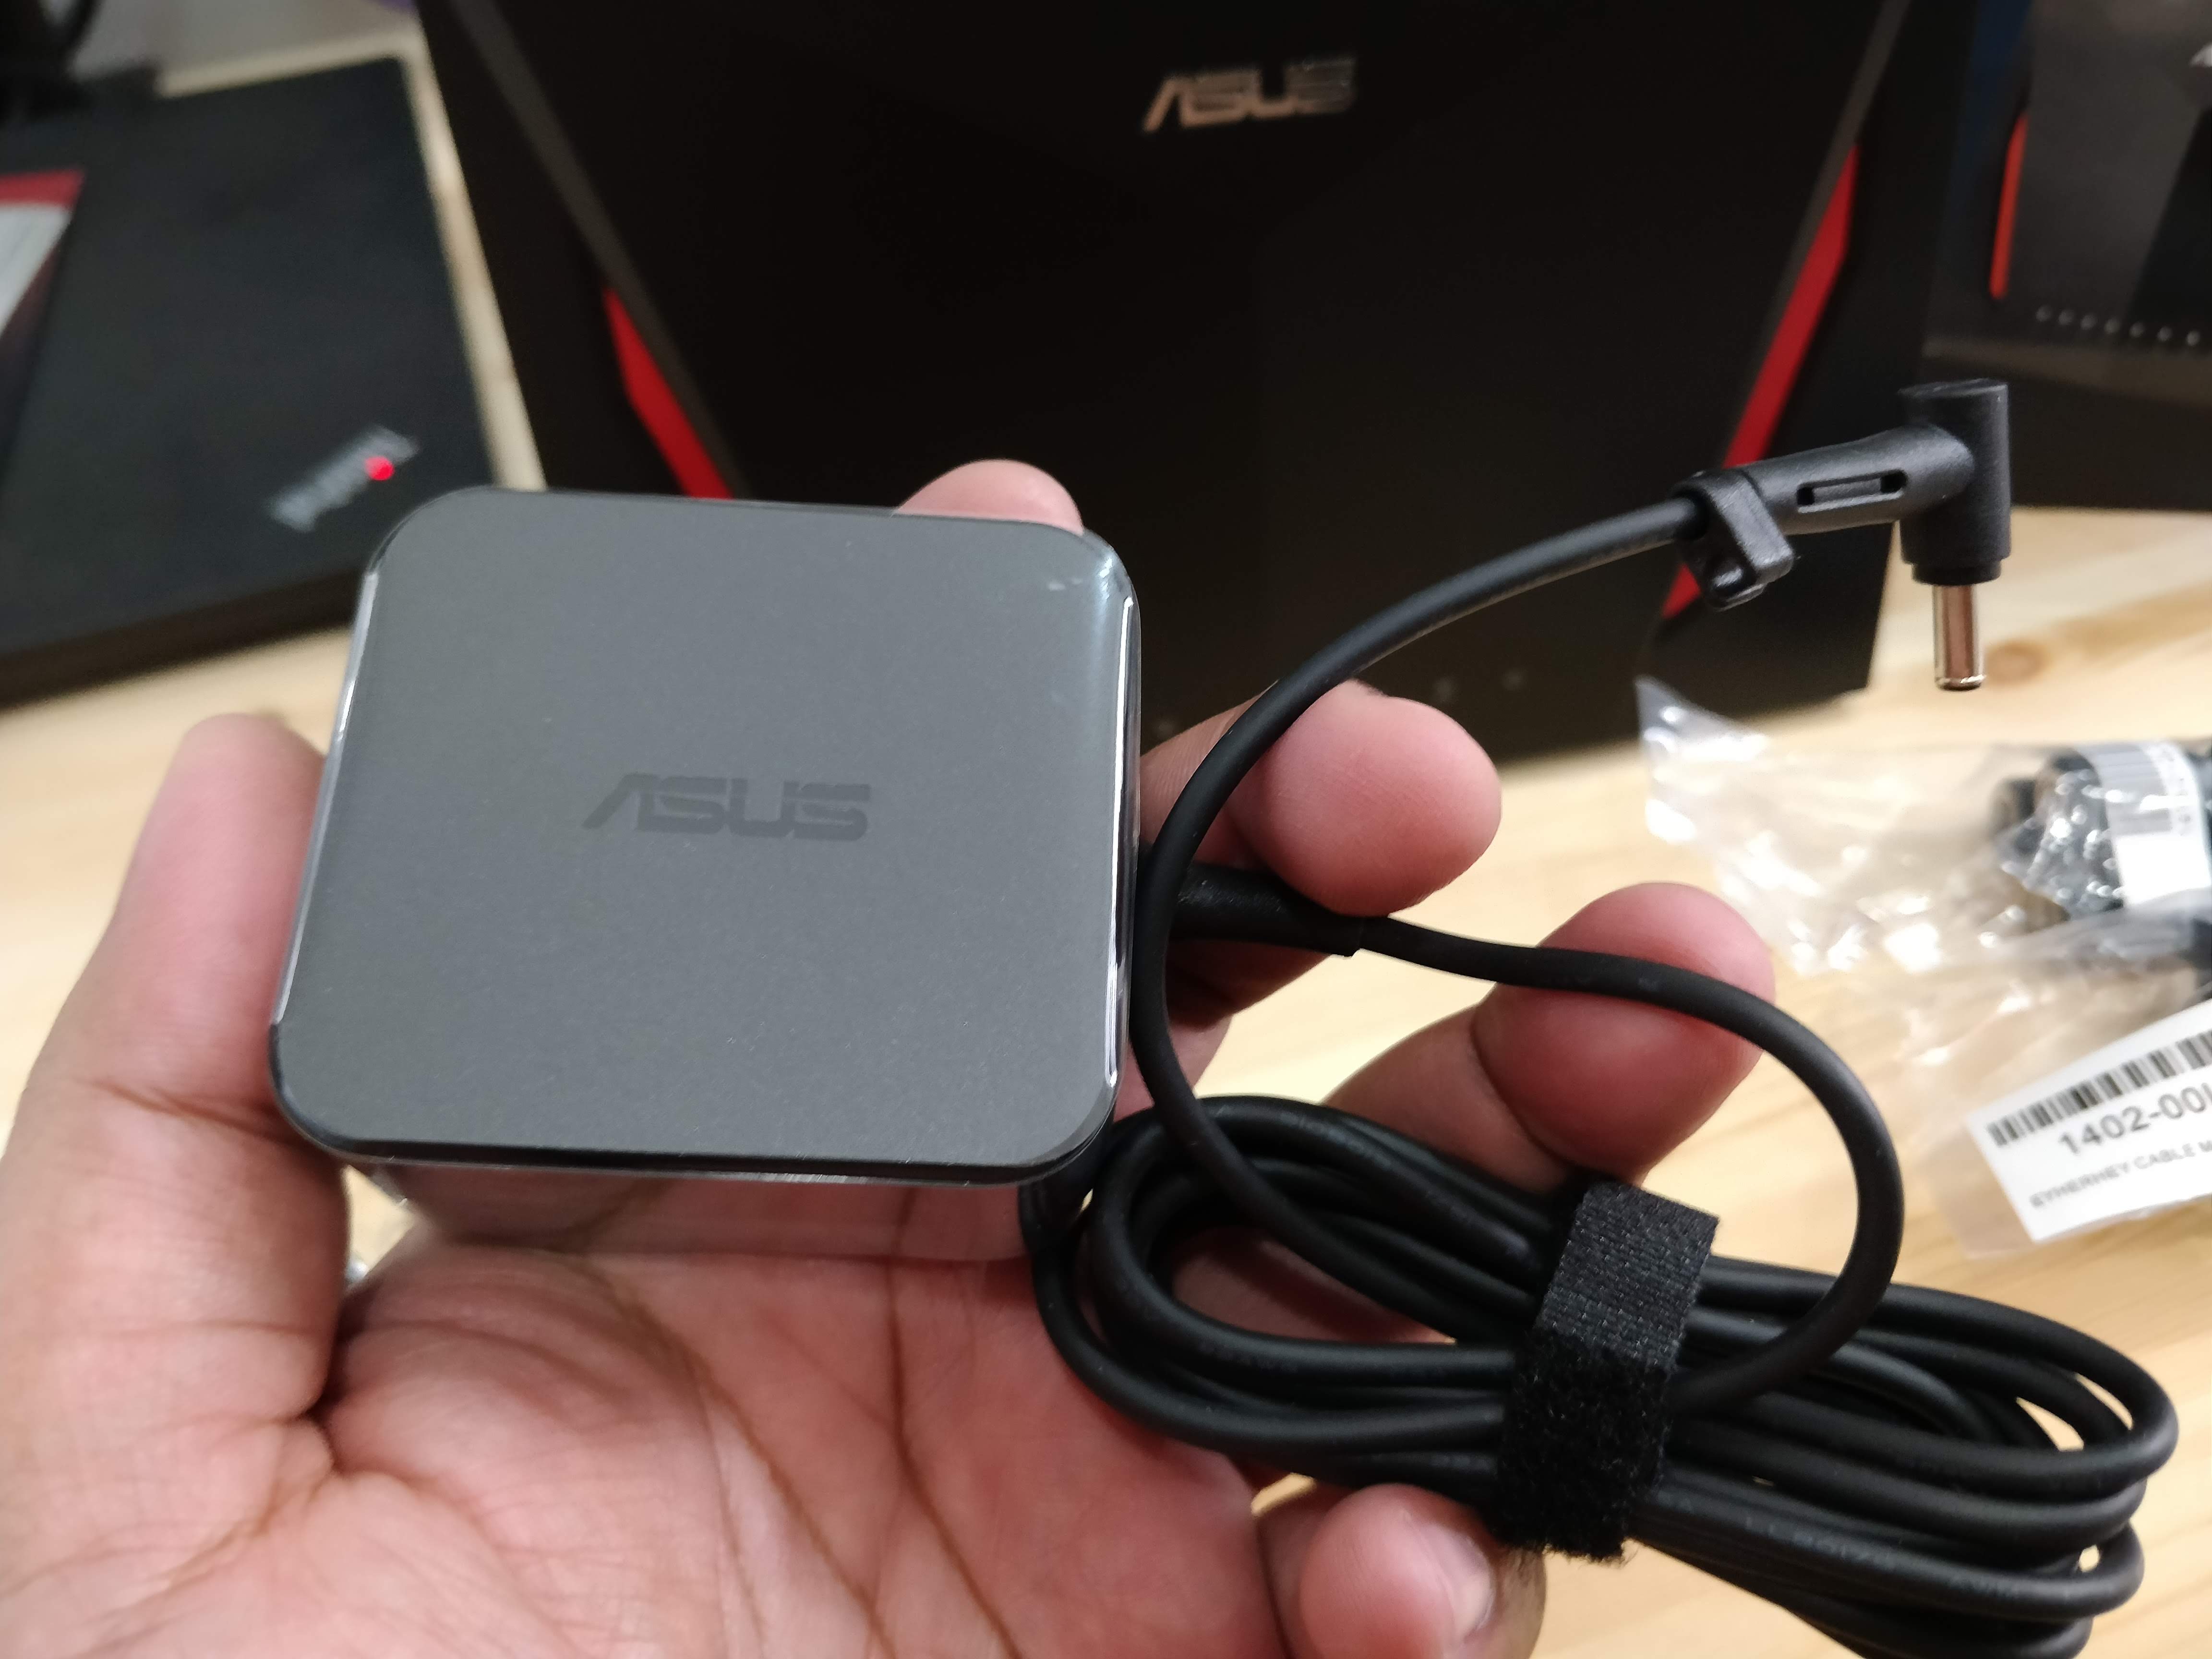
The power brick is much smaller compared to the RT-AC88U’s and also plugs in directly to the wall outlet instead of having a cord that goes between the power brick and the wall outlet which is what the RT-AC88U has.IMG_20180930_102447

This is where you slot-in one of the three optional outlet plugs.IMG_20180930_102514

Here’s a closer look of the three outlet plug options that came with the box. Type C on top, Type G on the left and Type I on the right.IMG_20180930_102359

Finally, the three antenna looks bland because it does not have any red color accents unlike the ones from the RT-AC88U. I think I can swap the antenna on both units.IMG_20180930_102600

So why did I switched when I’m going to lose Link aggregation, 4 Gigabit ports, 1×1 MIMO Tx/Rx stream and an external antenna? In my case, my RT-AC88U’s 2.4GHz channel died. As in dead as a Dodo. It’s not transmitting the SSID for the 2.4GHz but the 5GHz works flawlessly. I even tried flashing the latest stable Asuswrt-Merlin on the RT-AC88U which is an opensource alternative firmware for Asus routers that has more advanced features and faster security updates (which also supports the RT-AC86U). I was hoping that the newer software might fix the dead 2.4GHz but it seems like it is a common hardware issue with the router. Some folks online returned their units to Asus since they still have warranty but I think this is more trouble than its worth especially here in the Philippines. Below are some links online that shows people having issues with the 2.4GHz on the RT-AC88U:

Another big reason that convinced me to switch to the RT-AC86U instead of buying another RT-AC88U (AiMesh anyone? But then again AiMesh promises mixed routers should work) or going through the hoops of returning the unit to Asus is the age and design of the hardware. Just by looking at the model numbers, you’d think that the RT-AC86U is a generation behind the RT-AC88U. But that is not the case. The RT-AC88U was actually released back in October 2015 while the RT-AC86U was released in August 2017 – almost a two-year gap between the two. Given the two-year gap, the routers used a processor that’s available at the time of release (Broadcom’s 1.4GHz BCM4709C0 on the RT-AC88U  vs. 1.8GHz BCM4906 on the RT-AC86U) which explains the difference in speed. The difference in speed is really noticeable when booting, navigating, modifying settings and rebooting the routers and the RT-AC86U comes out on top.

My Last Day At Aprimo

As many of you know, this is my last day as an Aprimo employee.

Why did I decided to leave? A matter of principle. Let me first share the creed that I follow in life – a variation of Elbert Hubbard’s Loyalty Pledge.

If you work for a man in heaven’s name, work for him, speak well of him, stand by him and stand by the institution that he represents. Remember that an ounce of loyalty is worth a pound of cleverness.

If you must growl, condemn and eternally find fault then resign your position and when you are at the outside, damn to your heart’s content. But as long as you are part of the institution, do not condemn it because if you do, the first high wind that comes along will blow you away and you will probably never know why.

So why did I decide to move on? Truth be told, I lost hope. I conceded to the thought of things not getting better with the leadership, or lack thereof, in Manila.

Many sacrifices were made. Some were shoved aside, others did not get the point across, but collectively came to fruition. I am not sure how much damage was done and how deep it goes as far as the morale of the Manila center is concerned but with the recent changes and with a familiar face soon at the helm of the Manila center, things are finally taking a turn for the better, moving forward. I did not expect the needed change to come so swiftly and abruptly but it did.

Everyone now knows that there is hope, myself included.

Despite how things turned out and the generous counter-offer, I still decided to move on. Every time I think about the people I consider as my family at work, I could not separate the thought of how much injustice has been allowed to persist for the longest time and from how it should have been if only the right person was placed in the right role in the first place. As a result, there are those who are putting their self-interest first instead of the greater good. Not long after the buyout, I witnessed self-preservation over truthfulness, favoritism over loyalty and weight on tenure over merit. I can no longer do my responsibilities without being cynical. I think that at this point, moving on is better than second-guessing actions and motives. Trust is the only currency we need, for without it, there is nothing more to say.

I will not ask you to be happy for me nor to be worried for me nor will I tell you that I am surprised to make this announcement because I am doing this on my own accord and not because I am being pushed out of the company with a graceful exit. I am moving on in pursuit of maturity in my career and to temper my emotions when the subject matter turns into my work family because the recent experiences left that much bad taste in my mouth that I cannot stay.

But in spite of the things that went wrong, I met you. To each and everyone of you whom I have been able to work with, share light moments with, laugh with or even suffer with… I thank you for making this chapter in my career worth looking back to.

To those who are asking which company I will be moving on to, it is Within The Walls of this building. 😉 So if there is something that needs to be said, you know where to find me.

In any case, don’t be a stranger and say hi every now and then.

Andy

Five Sinigang To Try Before Getting Acid Reflux

Over the course of history, there have been a lot of innovation and experimentation in different industries. None more true than in the food industry where the simplest ingredient can transport you back to your childhood days or reinforce your cynicism towards the true intention of the one who prepared your food. 😀

Today, we have here a list of Sinigang dishes that you should try before getting an acid reflux and forever miss out on the sheer delight of mixing patis, kalamansi and sili before chowing down what’s right in front of you. So swallow down that lump in your throat and go over each of these variations.

5. Fried Pork Belly & Shrimp Sinigang
by Max’s

Nope, that is not two dishes. A unique twist on the homey sinigang by combining pork and shrimp. Land lovers and seafarers can gather around the dinner table and share a quick meal, even just once. Quick meal because the serving is a bit small.

4. Sinangag na Sinigang
by Kanin Club

Now this is by far the embodiment of the street vernacular “kanin palang, ulam na!” Instead of having a sour soup or broth, this dish gets a couple of slices of pork and deep fried gabi leaves as toppings. The rice itself has all the sinigang flavors one could ever ask for. Comes with siling labuyo on the side.

3. Sinigang Na Short Rib & Watermelon
by Manam

It has watermelon without the seeds. It has kang kong. It has sitaw. It’s more sweet than sour. The combination really shouldn’t work and yet manages to pass as one of the best sinigang ever. Pair it with plain steamed jasmine rice or two for maximum appreciation of its flavor.

3. Sinigang na Baboy in Guava and Pineapple
by Mesa

The pineapple is an interesting addition to the guava mix common in the provinces. It adds an extra dimension in terms of taste and gives off a surprising feeling once you bite into that pineapple in your mouth together with the pork and rice in guava broth. Again… pineapple together with pork and rice in guava broth. Dunno what just happened there.

2. Sinigang Na Ribs ng Baboy sa Bayabas
by Alex III

Not all things come easy. For the first-timers, this dish would smell funky. But don’t let that initial impression and smell stick with you even after you’re done eating. This is as close as it gets to an authentic guava-based sinigang here in the Metro.

1. Sinigang Na Corned Beef
by Sentro

So it has come to this. The classic. The Sampalok provides the right amount of sourness with a hint of sweetness to boot. The siling gulay provides a subtle spicy kick without the burning pain. The beef, ever so tender. On a slow day, the staff would even let you taste the broth before it gets served to give you a chance to fine-tune the flavor.

So there you have it. The fivesix sinigang dishes you need to try before getting acid reflux. Whether its a new spin on an old recipe or just the classics, the noble sinigang is always a good reason to gather friends and family around the dining table. All these are good for sharing so please do share, unless acid reflux is really your goal.

How To: Upgrade QNAP TS-451+ NAS To 16GB RAM

According to the product’s website, the QNAP TS-451+ has a ton of features that goes beyond just being a NAS – like real-time video trans-coding, virtualization platform and utilization of LXC and Docker containers.

When a NAS is no longer just a NAS

The available configuration for order is either a 2GB model (TS-451+-2G) or a 8GB model (TS-451+-8G). And based on literature on that website, the maximum supported RAM for the QNAP TS-451+ is 8GB. 🙂 8GB?! But we want to maximize the features of this NAS unit! I guess we would have to add more since one cannot have too much RAM. 😀

20161101_212629-copy
We have the base model (TS-451+-2G) that comes with 2GB of RAM

Based on literature online, other than the manufacturer’s advertised specifications, it is fully capable of supporting 16GB of RAM! So I went online and purchased this 16GB kit. This SO-DIMM is the same as the ones used for laptops (your mileage may vary):

G.Skill F3-1600C11D-16GSL, DDR3L-1600, PC3-12800, CL11-11-11-28, 1.35V

A closer look at the memory chips used for this 8GBx2 kit:

Each chip is 512MB and each stick has 16 of them which makes up the 8GB per stick

As mentioned earlier, the NAS unit that will be receiving this RAM upgrade is the TS-451+.

Step 1. Remove the drives.

Step 2. Remove the four screws at the back of the unit.

Step 3. Slide off the casing backwards to set the indicator at the bottom of the unit to the unlocked position.

Step 4. Lift the casing upwards to completely remove the case itself.

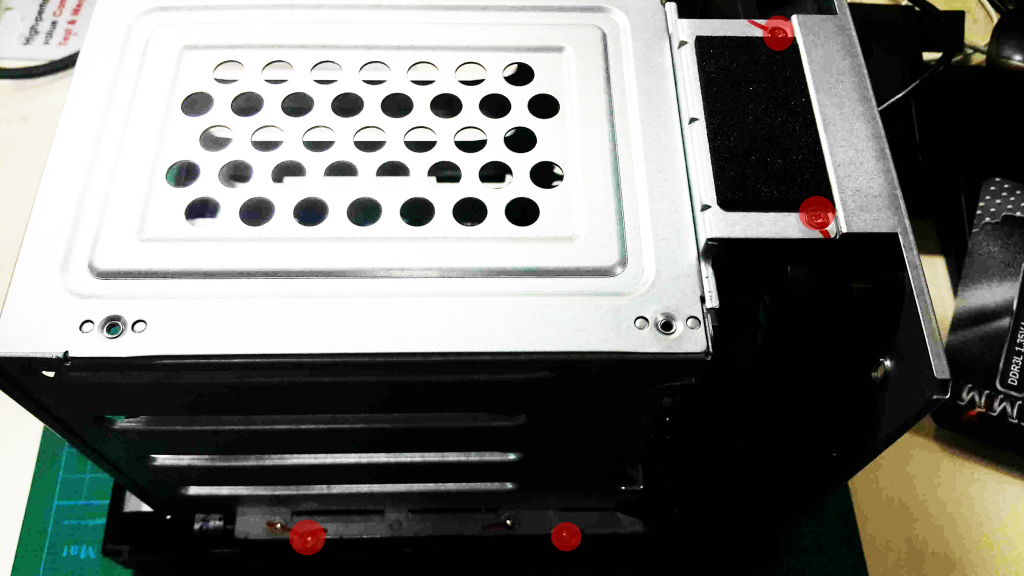
Step 5. Remove the screws that holds the hard drive cage. For a 4-bay unit, there is a total of six screws.

Step 6. Pull the drive cage straight up since there is a connector that connects the drive controller with the mainboard

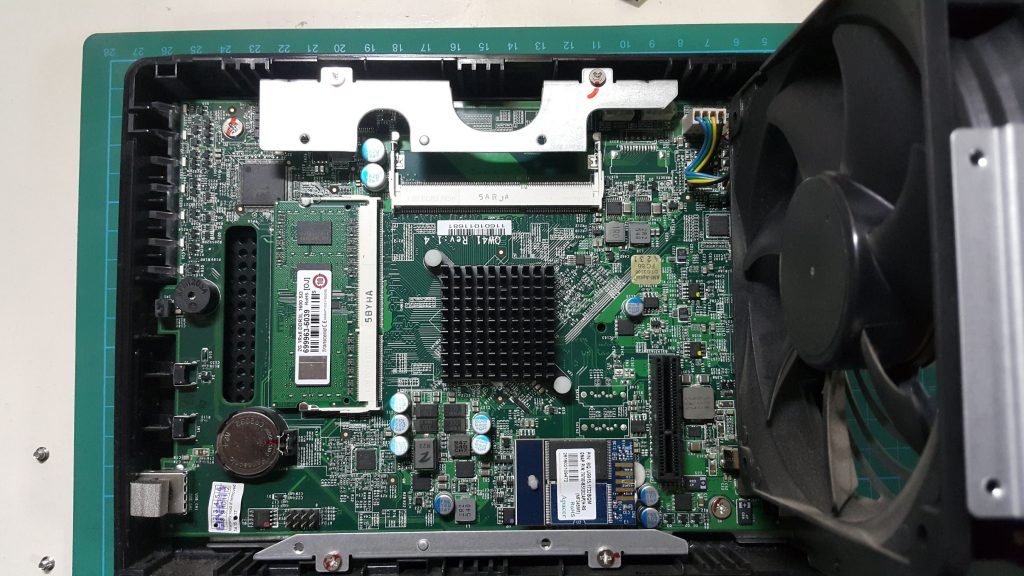
Intermission: Let’s take a look at the mainboard after removing the drive cage

We can see the RAM slots on the left and on top

The 2GB RAM that came with the unit is from Transcend.

A word of warning: the second RAM slot is a bit hard to get to especially with fat fingers.

Last look at the mainboard with the RAM slots installed with the 8GB sticks.

Step 7. Reseat the drive cage, tighten the six screws that holds the drive cage, slide back the casing and tighten the four screws at the back. Connect all the cables and fire up the unit. Check if the additional RAM has been recognized by the system.

Hardware Information says we have 16GB total memory and both memory slots are correctly recognized too.

Done. 🙂